|
Print address label, cards and more.
Get data from MS Excel, MS Access and print on your labels! |
|


|
||
|
|
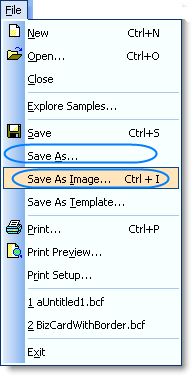
Save your business card workAfter you have completed your business card design, you can save the file as an image for sending to someone for professional printing, or save the design as a .bcf file so you can re-open it later for modifying, or just print it.
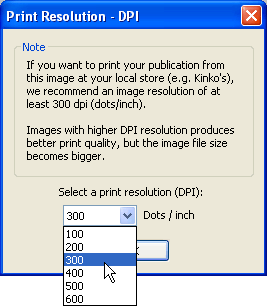
Save as a graphics Print Resolution : While saving as an image you can choose to save at a very high resolution image for better print quality. Business Card Designer Pro can save upto 600-dpi(dots per inch) resolution. While 300-dpi is sufficient for most good quality printing, but you can save at dpi higher than 300 also. When saving at higher dpi the file size becomes bigger.
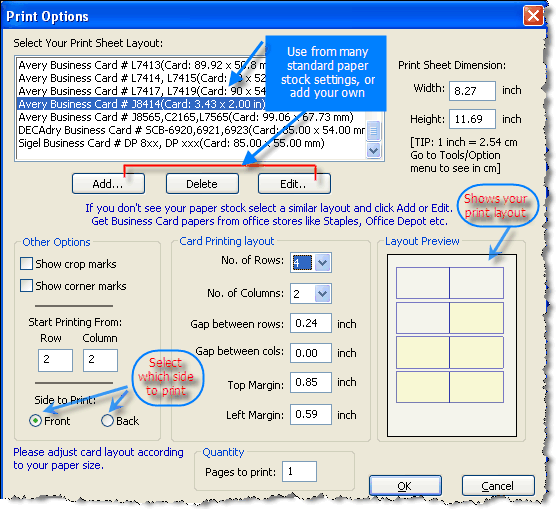
Print your business cardPrinting is the final output of your business card. You can print your card to any Windows compatible printer. Select menu File->Print, the print options window opens up. Choose your printing options- Number of pages: Enter the number of pages to print. Each page will print one or many cards depending upon other options. No. of Rows/Columns: You can print many cards on one page to maximize your page usage. Enter how many rows and columns of cards you want to print in one page. These numbers will depend on the size of your printing paper. Gap Between rows/columns: You can choose to space out the printed of cards in one page, so that you get some room while cutting the page to separate out the individual cards. Top and Left Margin: Printer will leave these margins on top and left of the paper while printing out the cards on each paper. This is very helpful for business card papers that come with margins. Show Crop Marks: These are the marks that are printed at the top and left of the paper to show the position of each row and column to help you cut the printed paper. Show Corner Marks: These are the marks that are printed at top-left and bottom-right corner of each business card to help you cut the printed paper. You can use corner marks and/or crop marks as a guide while cutting out your cards from the printed paper.
|
|
|
| home | buy | products | press | support | privacy policy | |
|
Copyright © Belltech Systems, Inc. All rights reserved
|
 Select menu File->Save As Image and choose a folder, file name and an image
format to save. Belltech Business Card Designer Pro supports these file formats for
saving as image: jpg, gif, bmp, png. You can open the saved graphics using any standard
picture viewer (e.g. Microsoft Paint, Microsoft Photo Editor, Adobe Photoshop) or email
to someone, or bring it to a local print shop to have professional copies printed.
